
Workflow for new projects
Basic knowledge using the Mouse
- Mouse Left-click: select object
- Mouse Left-click and Mouse drag: Move selected object or select multiple objects
- Mouse Right-click and Mouse drag: Move map
- Mouse Wheel: Zoom in/out
- Mouse Wheel + CTRL key: Rotate selected object by 1° steps
- Mouse Wheel + SHIFT key: Rotate selected object by 0.1° steps
- Mouse Wheel + SHIFT + CTRL keys: Rotate selected object by 10° steps
Step 0: Initialize SODEPlacer Library Database (initial tool launch)
The “Make library database” wizard should automatically set the correct SODE Module and Add-Ons paths.
Click on “Make Database” to generate a library of all your SODE SimObjects currently installed on your harddisk.
SODE External Path:
It is possible to define an additional “external” path if you have placed SODE SimObjects in a different place on your harddisk. Usually, this is not the case, so leave this setting empty.

Once the library database is built, you can close the wizard.

Step 1: Import AFCAD/ADE BGL File
Starting point of every new project is a finalized AFCAD/ADE BGL file. What I mean by finalized is that the parking names and numbers should not change anymore. Position and other properties can still be edited in your AFCAD/ADE BGL file of course.
Click on the “Import Parking Positions from AFCAD” icon and navigate to your AFCAD/ADE BGL file and open it.


Step 2A: Save project as SODE XML placement file
After successful import of your parking stands it is time to save your project as a SODE XML placement file.
Click on “Save document as” icon and navigate to SODE’s xml folder C:\ProgramData\12bPilot\SODE\xml. Give your project a clear name, like in this example. I suggest you use your company name and the project name.
I prefer to save it in this “active folder” because SODE will then load your project the next time you launch your sim. Of course, you can save it to an other location.


Step 2B (optional): Set TargetSim property for entire project
If you want all the SimObjects (jetways, VDGS, etc) to only appear in a specific simulator, then you can set the so called TargetSim property in SODEPlacer (since v0.6).
Using this technique, you can create multiple xml placement files for your airport, each file targetting a specific simulator(s). An example would be to use non-PBR SimObjects in simulators before P3Dv4, and PBR SimObjects for P3Dv4 and P3Dv5.

Step 3: Remove parking stands not needed (without jetway)
After you have saved the project as a SODE XML file, you can now remove all parking positions that don’t have a jetway.
With the left-mouse button, mark all unnecessary parking positions and delete them with the “DELETE” key of your keyboard. In my example, those parking stands are some open GA parking positions.

Step 4: Add a Jetway to a Parking Stand
Double-click on one of the parking positions that will have a jetway attached to it, the “Edit Stand” menu should appear.
“Stand Facilities” lists all possible equipment that can be hooked up to that parking stand, up to 4 jetways and one VDGS.
Click the “Add” button on the Jetway 1 slot and then left-click somewhere on the map to place the object. The tool will place a default placeholder object initially.

Double-click the placeholder object, the “Edit Jetway SimObject” menu should appear.
Select a proper jetway SimObject by clicking on the big “SimObject” selection button on the right.

The tool will show all available SODE Jetways that are currently installed on your system. Expand to the “SODE Add-Ons” folder (C:\ProgramData\12bPilot\SODE\SimObjects) on the left to get the list of available jetways.
Navigate to your project and select your jetway.

Your jetway is now placed and linked to the selected parking stand.
The red dashed lines show the rotation limits of the jetway and the length of the lines show the maximum length of the jetway bridge. So you can see roughly if the jetway is able to reach the aircraft door.
The rectangle illustrates the current jetway position and length.

Step 5: Position your Jetway from within the Simulator
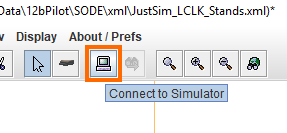
It is time to fire up your simulator and connect the SODE Placer tool to it to enable live placement of the jetway SimObject.
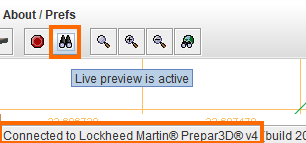
When the tool is connected to the sim (you see the status on the lower left status bar), enable live-preview by clicking on the binocular icon.
You should now be able to see your placed jetway in the sim. Note that in the example, the static BGL jetways are still visible.
Now you can move the jetway by holding your left-mouse button and dragging it to the right spot.

You can now edit your jetway by double-clicking it and set the main heading. Per default, SODE Placer places the jetway parallel to the parking position.
You can also edit the initial state (or “pose”) of your jetway using the keyframe controls on the bottom. Note that the keyframes always range from 0 to 100. You can see live the results in the simulator. Note that the legs are not animated in the preview.
When you are happy with the position and pose of the jetway, close the menu and save the project. You have successfully placed your first dynamic SODE Jetway!
Step 6A: Static Jetways – Creation
For large projects with many jetways, it is a good idea to provide static jetways. The dynamic jetway has all the bone animations data included and placing lots of them hurts performance in the sim. A static jetway is the solution.
SODE will switch from the static version to the dynamic jetway once the user selects the parking stand through the menu or via GSX. Therefore, the static variant of the dynamic jetway must match the pose you have set for your initial state of the dynamic jetway (initial Keyframes).
In order to keep the number of objects low, it is better to re-use the same pose of the dynamic jetway and place that multiple time. You can add variation by playing with the main “heading” property to turn the entire jetway.
Remember, every different pose of a dynamic jetway needs a matching static variant!
To create a static variant, you have to use the “SODE Static Jetway Creator” script included in the Jetway SDK.
Load your basic jetway model in your modelling tool of choice (gmax or 3dsmax) and run the script.
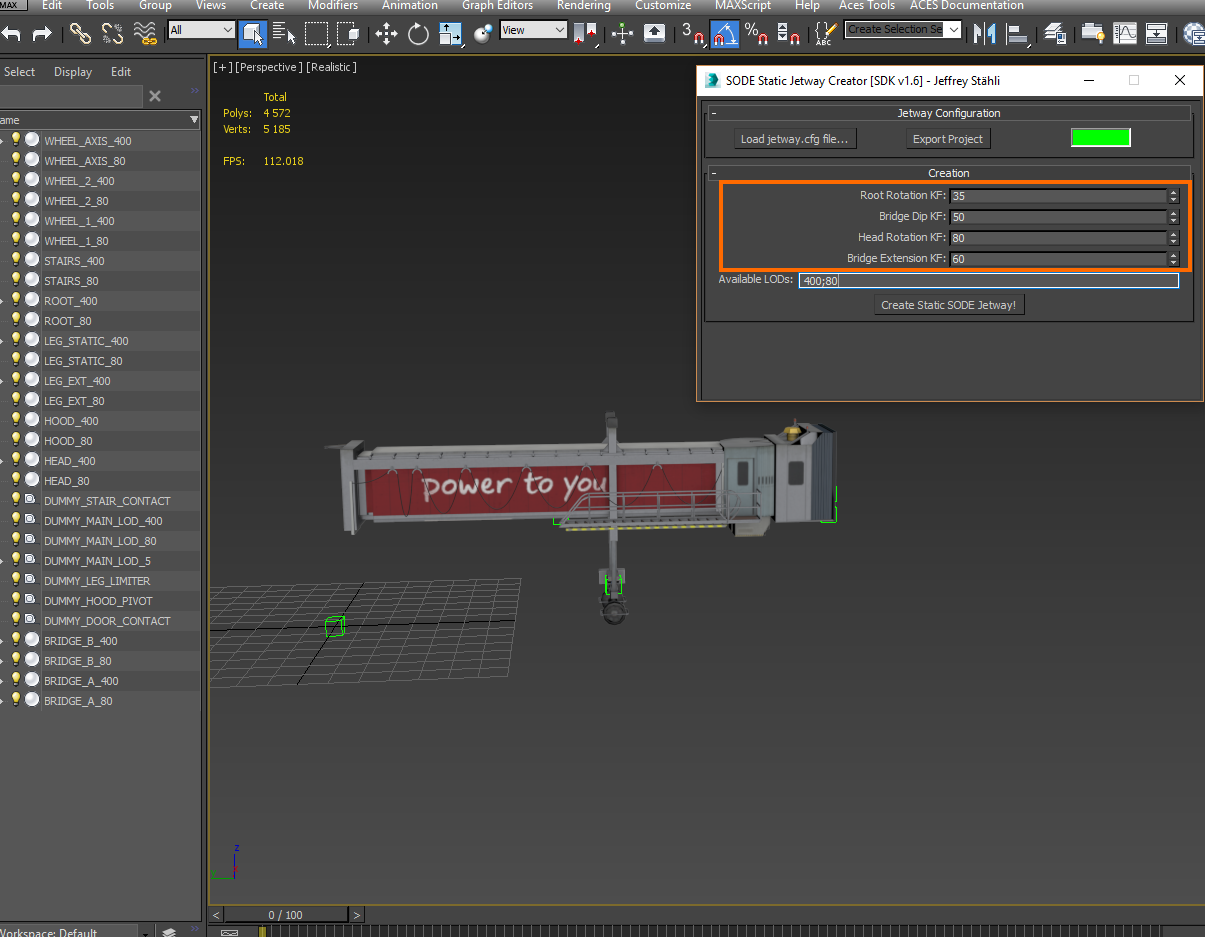
First step is to load the corresponding jetway.cfg file. A green “light” tells you that the data have been successfully imported.
Fill out the keyframe data according to your dynamic jetway’s initial keyframes that you have set before. Specify any LOD and then hit “Create Static SODE Jetway!”.
Save the resulting jetway to a different name (e.g. LCLK_SODE_Jetway_S_35_50_80_60.max, S means “Static” and the numbers are the keyframes, so I know what I used for that model).
Export the static model to a .X file and convert that to an mdl using your FS SDK of choice.
The newly created MDL needs to be added to your SimObject container, don’t forget to update the sim.cfg.
Here is the example of this project’s (final) sim.cfg and the container structure, the way I organize my projects:

Make sure that in the [General] section Category=Viewer and Module=SODE!
The “title=” is the SimTitle -> this is used in the SODE Placer tool to define the static variants, see below.
Step 6B: Static Jetways – Update Library Database
Now that you have updated your SimObject container with the new static jetway, you can now update SODE Placer’s internal library database.
Go to “Tools” -> “Library Manager”

Then choose “Library” -> “Rescan Containers”.

The same wizard will show up like in the initial library database creation step (Step 0). Rebuild the database.
Once the rebuild is complete, your static jetway should show up in your project folder.

Step 6C: Static Jetways – Activate
To activate the static jetway you need to add the SimTitle of it to the dynamic jetway. To copy the static SimTitle, double-click on the table cell with the static jetway, or right-click on the cell and choose “Copy SimTitle” (see image above).
Close the “Library Manager” window and double-click on the dynamic jetway object to open the “Edit Jetway SimObject” menu.
Right-click on “StaticSimTitle” textfield, then choose “Paste SimTitle”.

This parking stand now has a static jetway per default which will switch to the dynamic one as soon as the user selects that parking stand.
Step 7: Copy Jetway(s)
Imagine you would need to setup every parking position in your 100+ jetway project like above…
That’s why I added a copy jetway feature into the tool which allows to copy the jetways and its properties (source parking) to multiple other parking stands (target parkings)!
This image will show you have it works

This is the result after ALT + Left Mouse-click:

All the target parkings now have the same jetway (or multiple jetways if you defined it in your source parking) with the exact same properties (static variant, initial keyframe values).
Only the main headings are set to be parallel to the individual parkings. The only thing left to do is to accurately place them using the live-preview and to fine-tune the headings.
Step 8: Adding another static jetway variant
In my example, on one parking stand, the jetway that I used so far was too long (remember, we want to re-use the same jetway pose as much as possible!).

The only solution is to create a new pose and of course a corresponding new static variant.

So I edited the initial state keyframes until I was happy with the new “pose”. I also updated the “StaticSimTitle” property already here and added that simtitle into my sim.cfg in my SimObject container.
Again, I created a new MDL using those new Keyframe values using the “SODE Static Jetway Creator” script (see Step 6A). So I have now a second static jetway matching the pose of the shortened dynamic jetway.
Using those two “poses” I was able to populate all parking positions for this sample project.
Final models in the SimObject container are 1 dynamic jetway and 2 static variants.
Step 9: Dual and triple Jetways
Having dual or even triple jetways is the same procedure as placing the first jetway, just add it to the appropriate slot in the “Edit Stand” menu (left-click on parking stand).
One thing to consider is that the #1 jetway is always the one nearest to the terminal. So the numbering is from front to back.

Workflow for existing, manually created projects
If you already have started or even finished a manually created XML file for SODE jetway projects, you can still open it in SODE Placer and work from there.
Step 1: Load your xml file
Open your xml document and SODEPlacer should load all your jetways. Note that the parking position symbols (green) are placed at the jetway origin position.
If SODEPlacer is not able to load your xml file, then there is something wrong in it (syntax)
Step 2: Link AFCAD/ADE file to your project
To properly link all the AFCAD/ADE data, you can import your AFCAD/ADE bgl file as described in the first tutorial above (Step 1: Import AFCAD/ADE BGL File).
SODEPlacer tries to match existing parking positions with jetways with the AFCAD/ADE data. All the other parking positions will be left “unlinked”.
Step 3: Remove unnecessary parking positions
Like in the first tutorial, you can now remove all parking positions that don’t have or will not have a jetway.
With the left-mouse button, mark all unnecessary parking positions and delete them with the “DELETE” key of your keyboard.
Tipp for already completed xml projects: If you are absolutely sure that all your loaded jetways are already correctly linked to a parking position, you can also use the “Delete unlinked parkings” button in the top menu.
You might need to click somewhere in the map to refresh the display.

Save your XML!
When your project is cleaned up, you can start editing or adding jetways normally.
This concludes the tutorial.